Devlog #3


Devlog #3 Big Red Button
The Process
First of all, it has been a while since my last devlog on this project. During my absence I went through submitting 2 university assignments, learned a lot about Substance Painter, and had a nice Christmas holiday. Happy New Year everyone! Even though I am writing this at the end of January. It is quite unfortunate that I wasn't able to work on this continuously since the start, but going forward I will stay on track and do weekly updates on my work. So, just to quickly catch up, I was able to familiarise myself more with Substance Painter over this break period and I'm really eager to produce a model that's much better than my previous one. I won't be going back to improve the cube model, as that will only be a time loss in the end. The model is good enough and I would love to look back at it later on and see how much I've improved.
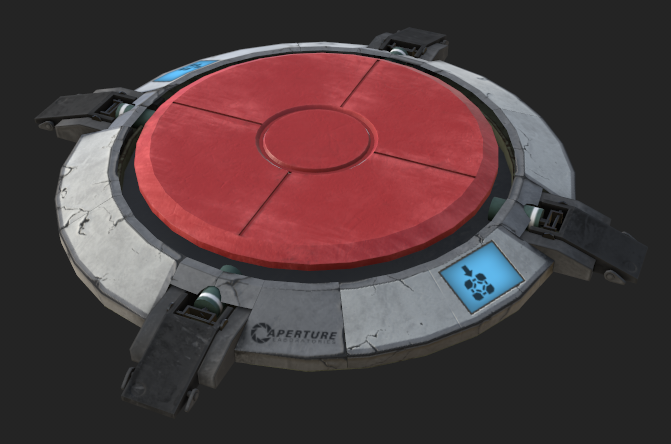
This time around I struggled with finding great reference images, mostly because I needed an orthographic view of the button, I considered opening the game, taking screenshots, and drawing projections from those, but later on I found the original model from the game on Sketchfab. Using that as my reference was easier because at any point I'm able to rotate around the model and get better angles as my reference.
The model is very circular so I started off with a simple circle and expanded from it. It took me a while to realise how to work through this model. It has a lot of different parts, and later on I realised the white plastic shell on it is split into separate elements, and the whole thing has a little metal part on the inside. I realised I really should have studied my reference more before jumping into the model. I'm extremely happy with the end result of the model, however I did waste a bunch of time by going back and reshaping the shell, as well as adding the inside correctly. I used the mirror modifier once again to mirror quarters of the shell around the centre.
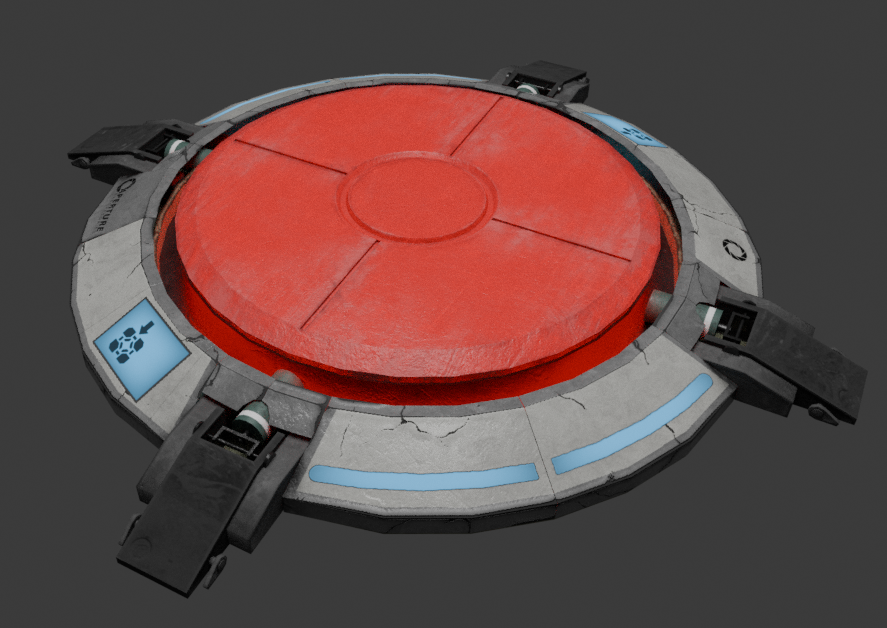
After the outer ring was done, I created red button on the inside which proved a little more challenging than I thought because of the little indents on it. I was considering adding them through a normal map, but I decided that they are too big of a detail to be just a normal map. After the button was done, I had this idea of it being transparent plastic and having glowing elements below it. I achieved this effect by duplicating the button and scaling it down. This allowed me to create a glowing slight glowing effect later on during the texturing stage.
The final elements of this model were the legs. I definitely spent the most time doing these, as I realised they have a bunch of smaller elements inside of them. It took a bit of time but eventually, I got the mechanical parts in place. I had the model in the bag. I was quite happy with how it turned out, and I was ready to make the UV maps.
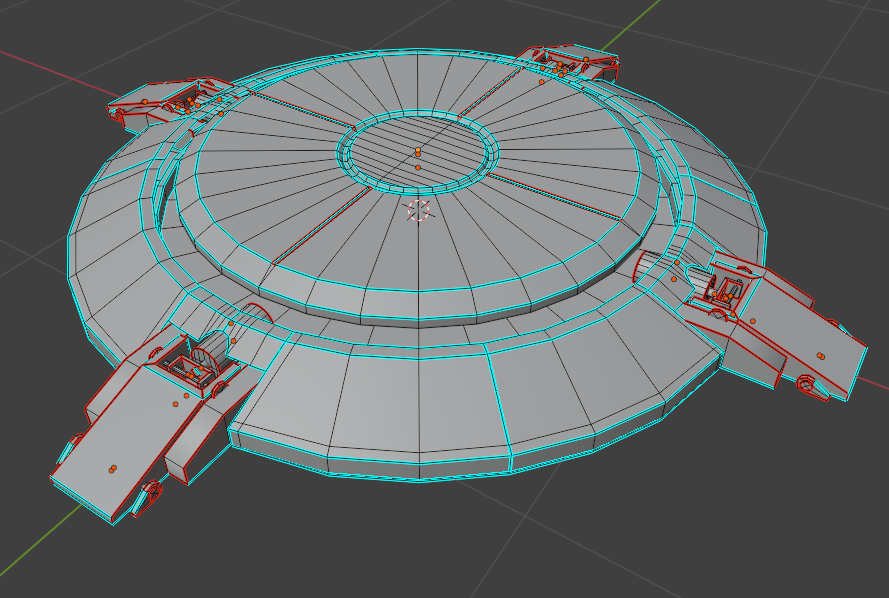
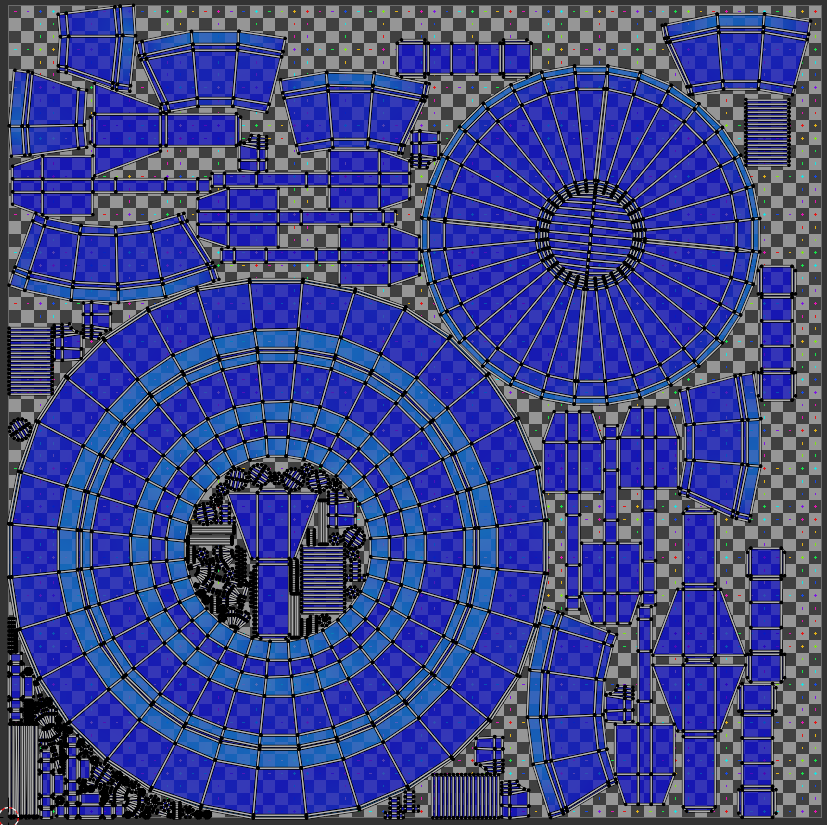
The hardest object I unwrapped for this model were definitely the legs. Not because of any singular one, but because the legs had a lot of elements I needed to marks seams on. I learned from my previous mistake, and I only applied the mirror modifier after I did all the seams for UV unwrapping. After that got sorted out, it was pretty straight forward, following the same process as I did in my last devlog.
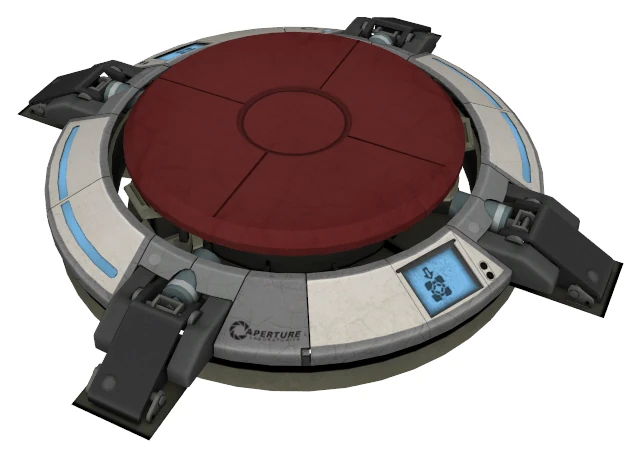
Taking it into Substance Painter, I now had much more knowledge of how to use this program. I still implemented the same strategy and started off with base colour, layering up my detail. I wanted to achieve a cracked paint look on the outer shell of the model, I did this by layering several effects and masks, I also discovered something knew which were the anchors. The anchors let me reference a mask and use that data specifically in another masks. I used this to add depth to the cracks, and make the paint pop out on the edges of the cracks, the final effect turned out amazing, and I recoloured it later to use as a darker tone.
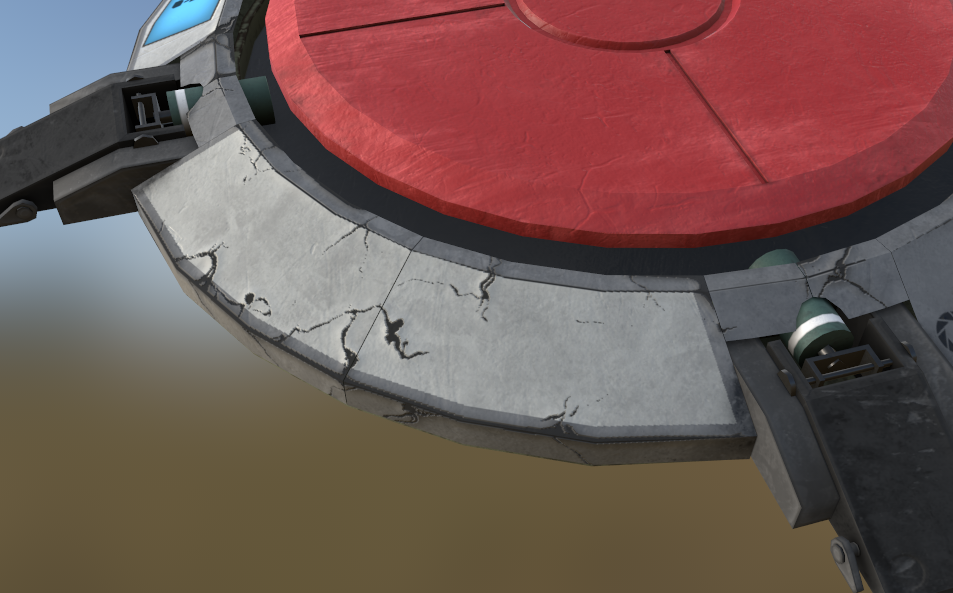
I also reused this material later on, toning some of the detail down, and removing the cracks to paint the legs. After that I only needed to add more basic materials such as the red button with some dirt, and the metal parts here and there. Additionally I made my own graphics in GIMP to create the blue displays on the model, and added the Aperture Science stamps where needed.
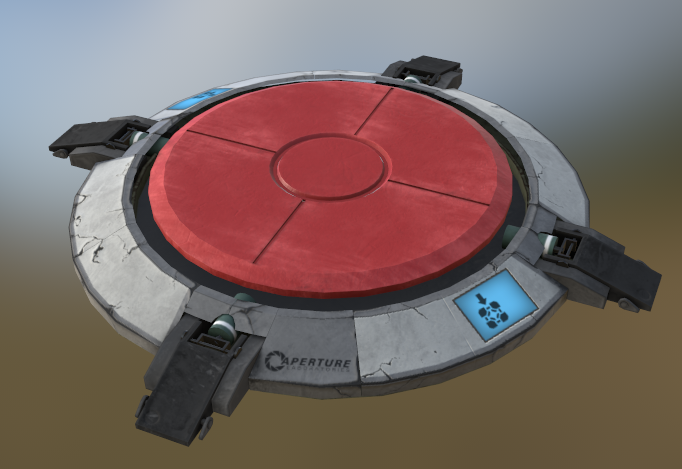
The final product turned out amazing, I'm incredibly happy with how it turned out. I did spent a ton of time on it, more than I expected, and it is possibly due to me taking too much attentions to small parts and issues that didn't really need that much detail. In the end it looks great but perhaps it would have looked just as good with less details, and more time saved.
The Evaluation
This model was a huge improvement from previous work. There were definitely some lessons learned. I struggled a bit at the start with finding the perfect reference images, especially since I needed an orthographic view, and that led to some unnecessary backtracking on the shell design. Jumping in without fully studying my reference meant I ended up reworking parts of the model, which slowed me down more than I’d like. I also learned the importance of timing when using the mirror modifier; applying it before marking all my UV seams on the legs caused me extra work later. While the model ultimately looks amazing, I can’t help but wonder if spending less time on some of the finer details might have been a more efficient approach without sacrificing the overall look.
The Reflection
Despite those hiccups, I’m really happy with how the button turned out. Coming back to the project after a busy break and picking up new techniques in Substance Painter was both challenging and fun. I loved experimenting with the cracked paint effect using multiple layers and anchors. I think it really brought out the character of the model that I was going for. Creating the glowing effect by duplicating and scaling the button felt like a cool twist that added some extra pizzazz to it. I know I may have overcomplicated a few details, but this process has definitely helped me grow as a 3D artist. Moving forward, I’m excited to apply these lessons to streamline my workflow and balance detail with efficiency.
Next devlog I'll see to making a smaller pedestal version of this button, and hopefully I'll improve and spend less time on it.
Leave a comment
Log in with itch.io to leave a comment.