Devlog #5


Devlog #5 What's On The Radio
The Process
The radio was the goal for this week. I had completed 3 models so far in this style, and I knew the ins and outs of the process I needed to go through, which I hope is reflected in these devlogs.
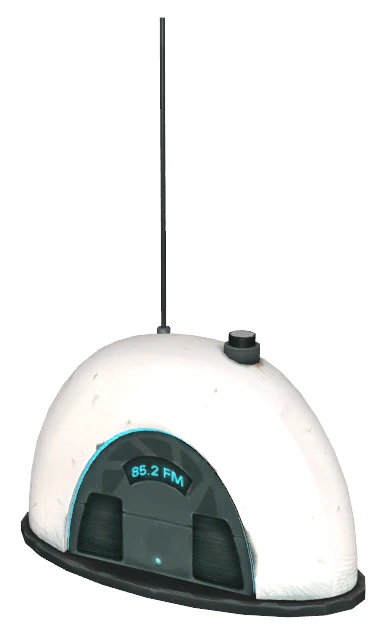
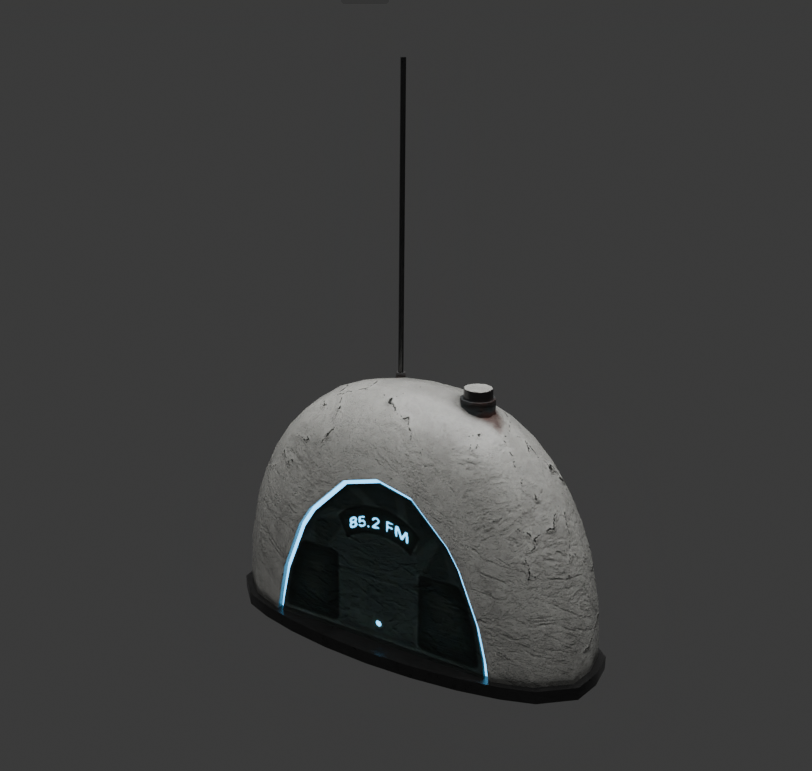
The portal 2 radio is one of the most iconic models in Portal, mostly due to the groovy tunes that sound from it, but also because of its memorable design. It has a smooth curved shape with 1 long antenna, a control knob at the top, and a glowing display in front, tuned to 85.2 FM. Seems like the most memorable designs tend to be the simplest.
I gathered my reference, which I had opened from last week when I was looking at the button, and came to the conclusion that the biggest part of this model will be its main body, which means I will need to get it just right.
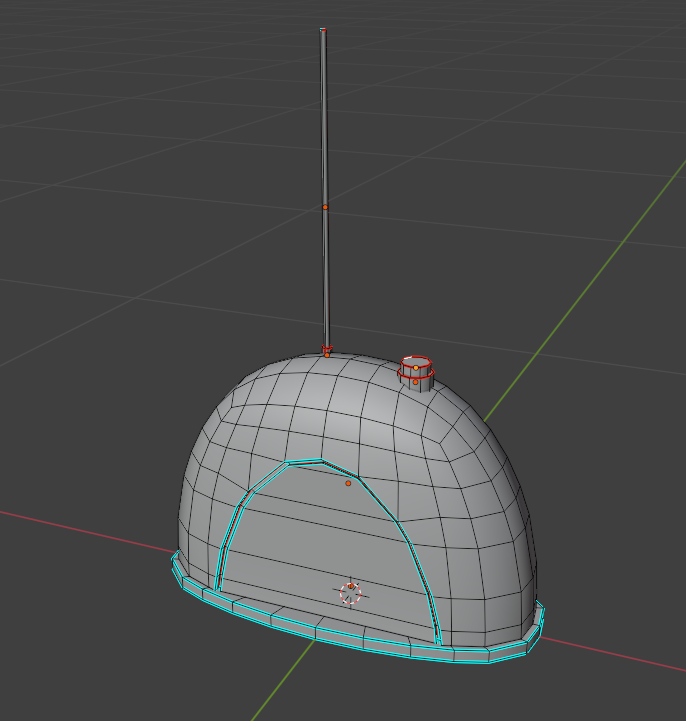
With such a smooth curve, I contemplated using a sphere as a base, however I thought that would introduce a lot of redundant topology at each end of the model, because the sphere’s top and bottom end with a pole by default. I instead chose to build from a cube that has a subdivision surface modifier on it. This keeps the geometry low at the start, with very little detail, but allows me to control the shape much better by adding loop cuts where I want.
I placed the reference into Blender and started scaling the mesh in edit mode, to match the shape in the reference. Took a bit of time, but I eventually shaped it to what I found acceptable. After this I deleted the bottom half of the shape as that's where I'll put the base of the radio.
To do the base I just duplicated the bottom loop of the radio and extruded it outwards, and downwards. Then I added the antenna and the knob. The rest of the time I realised that I needed to place for the display, it has a elliptical shape and the only way I knew of how to recreate that was to use a boolean modifier. This modifier lets me cut out a part of an object with another object, I used a sphere and cut out the front part of the body, added faces, extruded here and there, and I had a place for the display.
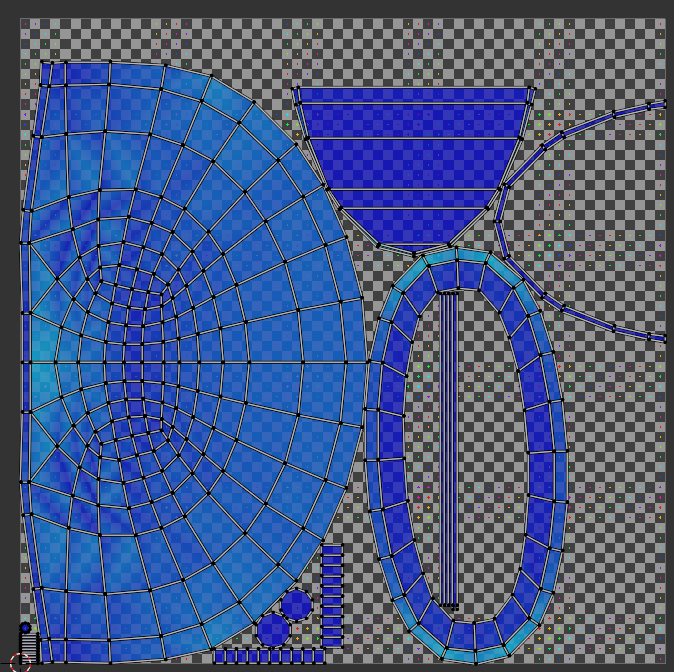
Unwrapping this model was super intuitive, I feel like I've really improved my topology flow, making my whole workflow easier because of that. There's slight stretching on the main body of the radio, due to it's spherical shape. However, it is well within the acceptable bound to my eye and I didn't want to add seams that would be visible in the final model.

Final Step was placing down the materials, and as I've learned before: work smarter not harder. I simply saved the materials I did in my pedestal button and applied them to my radio. All of the materials have the same colour scheme and there was only a few unique elements that I needed to put focus on.
Firstly, was the display. I didn't think recreating it in GIMP was entirely necessary as at that point I would just be tracing the original. If that's the case, I might as well take a screenshot of it and paste it in, which is exactly what I did. I do think there is an advantage to creating your own custom images for these types of things, which I did do for the floor button, because it lets me customise the exact placement, colour and shape that I want on my model. However, in this case I would have been wasting time trying to achieve the exact same look of the original, which I can just copy, and apply within seconds. What I did do later on though, is take the original in to GIMP to select the text and glowing diode, and create an emission map for my model so that I can have them glow in the final product.
Now the last thing I needed to do was add finishing touches like rust around the knob and below the antenna, as well as an Aperture Science logo at the back of the radio.
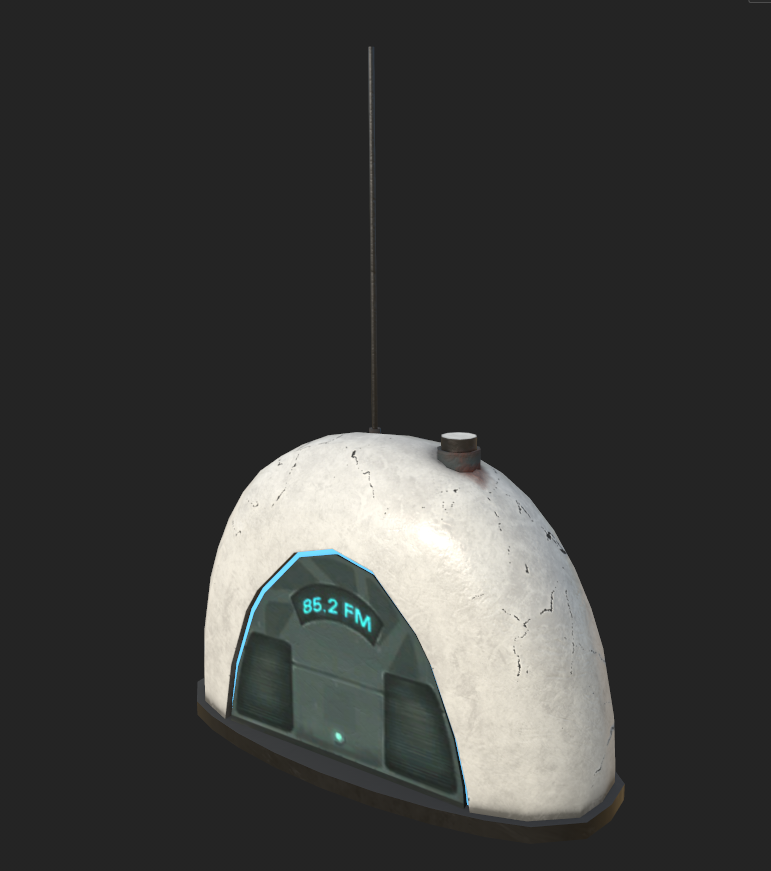
This model showed me that I have finally improved my modelling and texturing skills and workflow throughout this project, and the final look of it looks really good. My only complaint with it is that I could have added more topology around the rim of the display, however the model will be seen from a distance so its not much of an issue. You can also see that the displacement is quite strong on the model in blender, however once again, from a distance it makes the model look really great, from the testing that I did.
The Evaluation
Looking back on the radio model, I can see some clear wins and a few areas where I could have done better. Using a cube with a subdivision surface modifier instead of a sphere was a smart call because it kept things manageable, even if I ended up with a bit of stretching on the main body. The elliptical display was a bit of a pain; using the boolean modifier was more of a quick fix than a perfect solution, and patching it up with extra faces and extrusions wasn’t my smoothest move. Reusing materials definitely helped maintain a consistent look, but I wonder if I could have injected a bit more creativity into some parts, especially around the display rim where a little extra topology could’ve added better detail, and less sharp of those corners.
The Reflection
Overall, I’m really happy with how the radio turned out. It’s one of those models that shows how far I’ve come. I enjoyed the process, even when it got a bit frustrating with the parts like the display. It felt great to see my improved topology flow and unwrapping skills come together to create something that really captures the Portal vibe. Reusing smart materials and even a quick screenshot for the display saved me time and kept everything cohesive. Even with the few rough spots, the model looks awesome from a distance, and that’s what really counts for the diorama. I’m really excited to carry these lessons forward and keep pushing my skills in the next phases of this project.
Next week I will be tackling the last model that I set out to do, before bringing it all together the week following!
Leave a comment
Log in with itch.io to leave a comment.